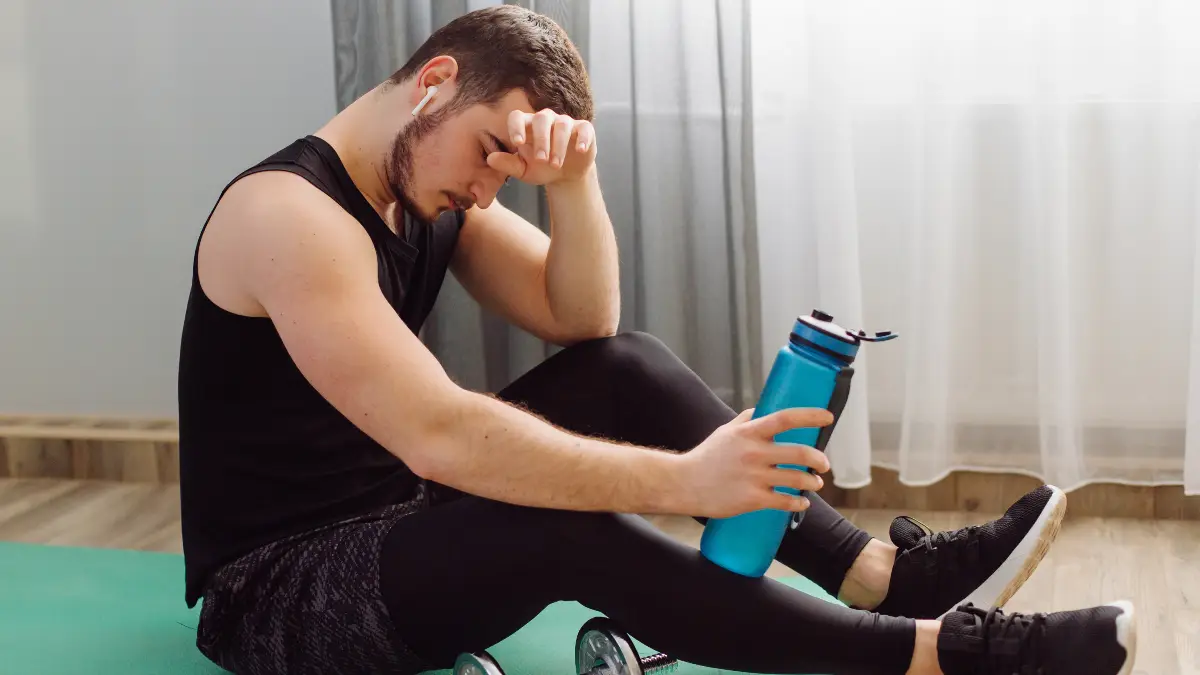
That tweak in your lower back after deadlifts isn’t a badge of honor. It’s a warning sign. Millions of people land in the emergency room from sports injuries each year, and the gym is a common scene of the crime.
Your shoulders, back, and knees often take the worst of it. You might think lifting too heavy is the only problem, but it’s usually something much simpler: bad form. Moving the wrong way under load turns a good exercise into a recipe for injury.
This guide is here to fix that. We will show you 13 common mistakes and give you simple steps to train smarter, get stronger, and stay off the sidelines for good.
1. The Squat: Knees Caving In
A common and risky mistake during squats is when your knees collapse inward. This can happen when you go down but is more common when you come back up. This breaks the straight line you should have between your hips, knees, and feet.
When your knees cave in, it puts a lot of bad stress on your knee joint. This inward collapse can stretch the ligaments on the inside of your knee.
It’s a major cause of ACL injuries, especially for women. It can also cause your kneecap to rub against your thigh bone, leading to a common problem called “runner’s knee.” This mistake often starts with weak hips or stiff ankles, not the knee itself.
The Fix (How to Master Your Form) Fixing this takes two steps: thinking about your form during the squat and doing exercises to fix weak muscles.
Focus on Your Knees: Actively push your knees out during the whole squat. Make sure they track in line with your second and third toes. A good mental trick is to imagine “screwing your feet into the floor.” This forces your hips to rotate outward and turns on your glute muscles.
Strengthen Your Hips: Weak outer hip muscles are a big reason knees cave in. Your strong inner thigh muscles can overpower them and pull your knees inward. To fix this, add exercises like clamshells and lateral band walks. These teach your hips to push out against resistance.
Work on Ankle Mobility: If your ankles are stiff, your body might cheat to get deeper in the squat. It does this by flattening your feet and letting your knees fall in. You can fix this by foam rolling your calves and doing ankle stretches.
Some elite powerlifters let their knees cave in a little on purpose for very heavy lifts. This is an advanced technique. For most people, it’s a mistake that can hurt your joints and must be corrected to train safely.
2. The Deadlift: Rounding the Lower Back
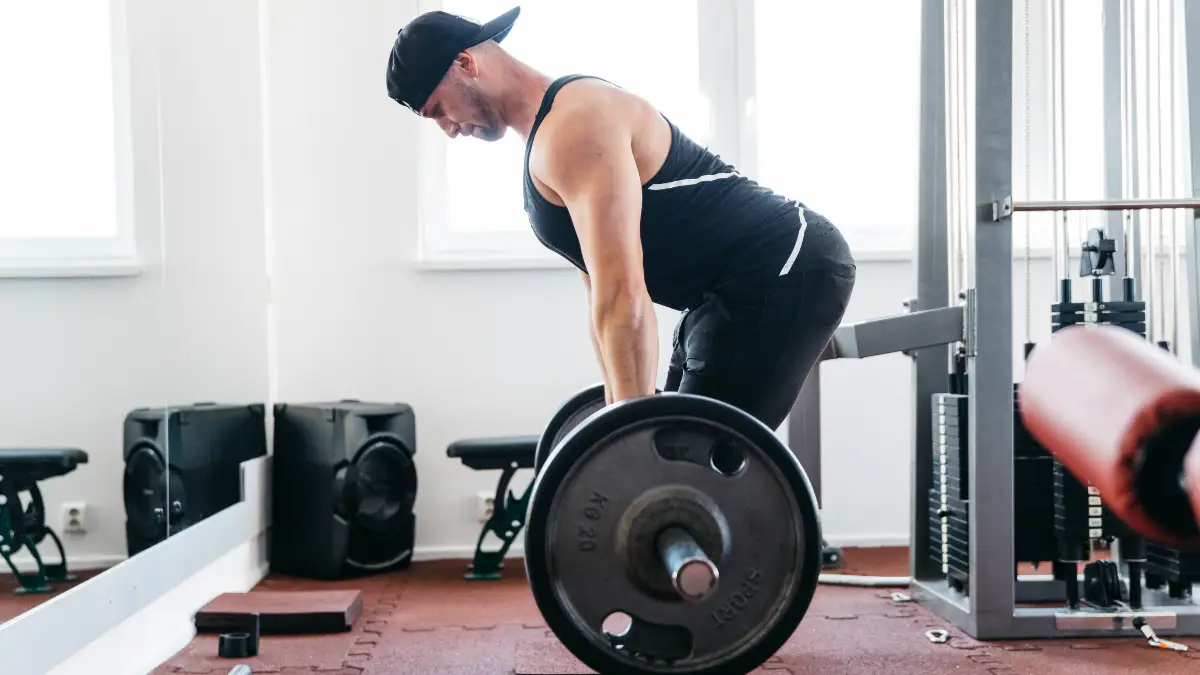
A huge mistake in the deadlift is letting your lower back round. This can happen when you set up, as you pull the bar off the floor, or when you get tired.
Keeping your back flat is a must for a safe deadlift. A flat back lets your powerful glutes and hamstrings do the work, while your core keeps your torso stable. When your lower back rounds, the weight shifts from your muscles to the small parts of your spine.
This creates a dangerous force on your vertebrae and puts a lot of pressure on your spinal discs. Doing this over and over can lead to disc injuries like a herniation, where the soft part of the disc pushes out and can press on nerves. Lower back injuries are a top reason lifters miss gym time.
To stop your back from rounding, you need to master the hip hinge and use your core and back muscles the right way.
Master the Hip Hinge: A deadlift is a hip hinge, not a squat. You start by pushing your hips back with a flat back, like you’re trying to touch a wall behind you with your butt. To come up, you drive your hips forward. A good cue is to keep your chest up and “show the logo on your shirt” to the wall in front of you.
Brace Your Core for Stability: Before you pull, take a deep breath into your stomach and tighten your core muscles, like you’re about to get punched. This creates pressure inside your abdomen that acts like a natural weightlifting belt to support your lower back.
Use Your Lats: Squeeze your big back muscles (lats) by imagining you’re “squeezing oranges in your armpits.” This keeps the bar close to your body, which reduces the strain on your lower back.
A Note on Upper Back Rounding: Some top powerlifters round their upper back on purpose to lift more weight. This is a risky, advanced technique. For everyone else, the safest way is to keep a straight line from your head to your hips.
3. The Bench Press: Flaring Your Elbows
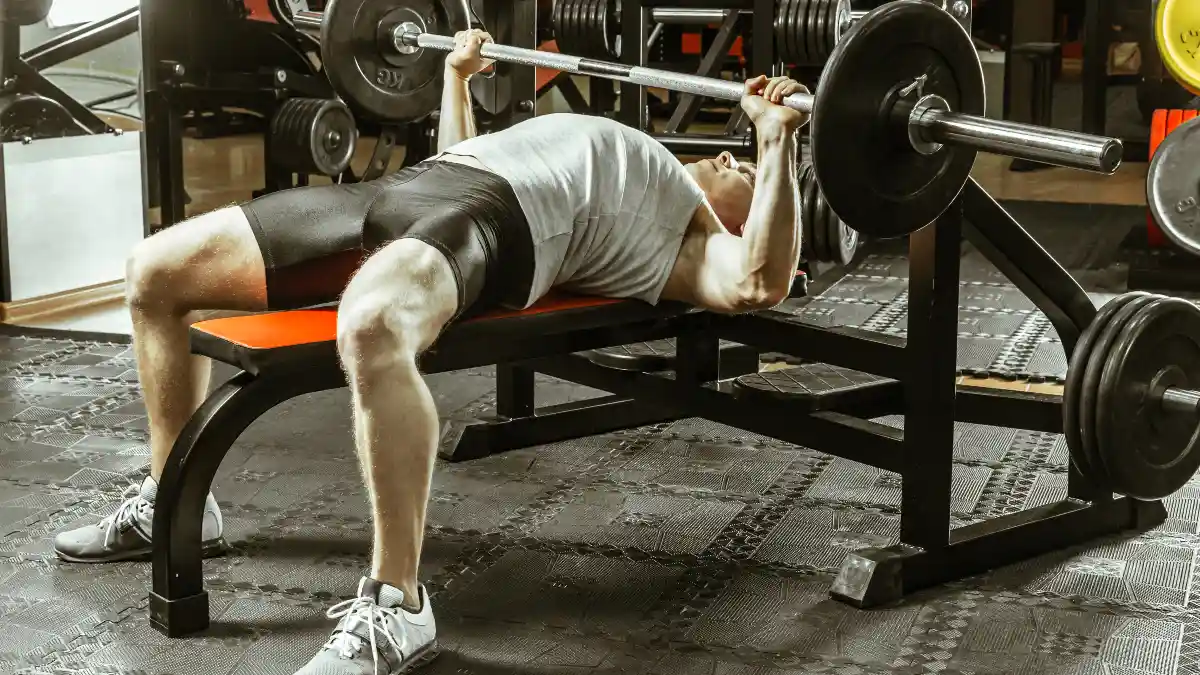
A common and dangerous mistake on the bench press is letting your elbows flare straight out to the sides. This makes a “T” shape with your arms and body at the bottom of the lift.
This flared-elbow position puts your shoulder joint in a weak spot. It narrows the small space in your shoulder where your rotator cuff tendons pass through. With every rep, the bone of your upper arm can pinch these tendons.
Over time, this can lead to a painful condition called shoulder impingement. Shoulder injuries are one of the most common weightlifting injuries, and the bench press is often the cause.
To protect your shoulders, you need a stable setup and good control of your elbows.
Tuck Your Elbows: The most important fix is to tuck your elbows closer to your body. The best angle is between 45 and 75 degrees. This makes more of an “arrow” shape with your body, not a “T.”
Check Your Grip Width: A very wide grip can force your elbows to flare. A grip just a little wider than your shoulders is usually best for both chest work and shoulder safety.
Set Your Shoulder Blades: Before you lift, pull your shoulder blades together and down, like you’re trying to put them in your back pockets. This locks your shoulder joint in place and gives you a solid base to press from.
Do Corrective Exercises: Weak muscles can cause your elbows to flare. Strengthen the muscles that rotate your shoulder outward with exercises like face pulls and band pull-aparts. Stretching your chest muscles also helps, as a tight chest can pull your shoulder into a bad position.
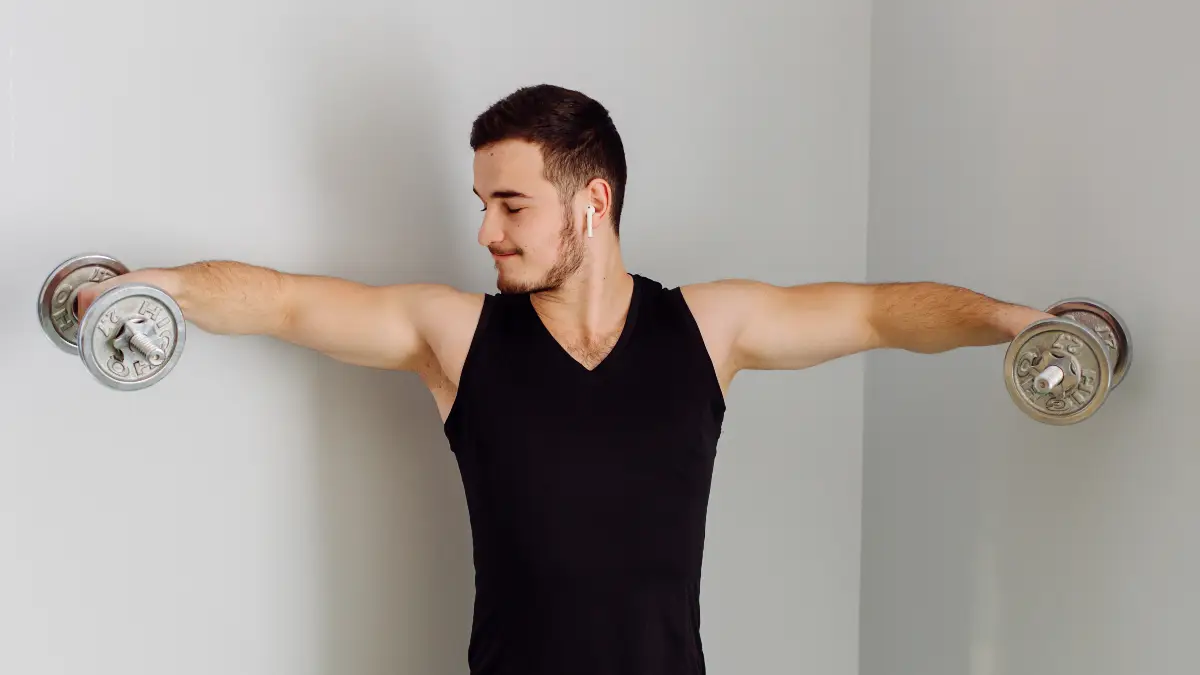
4. The Overhead Press: Arching the Lower Back
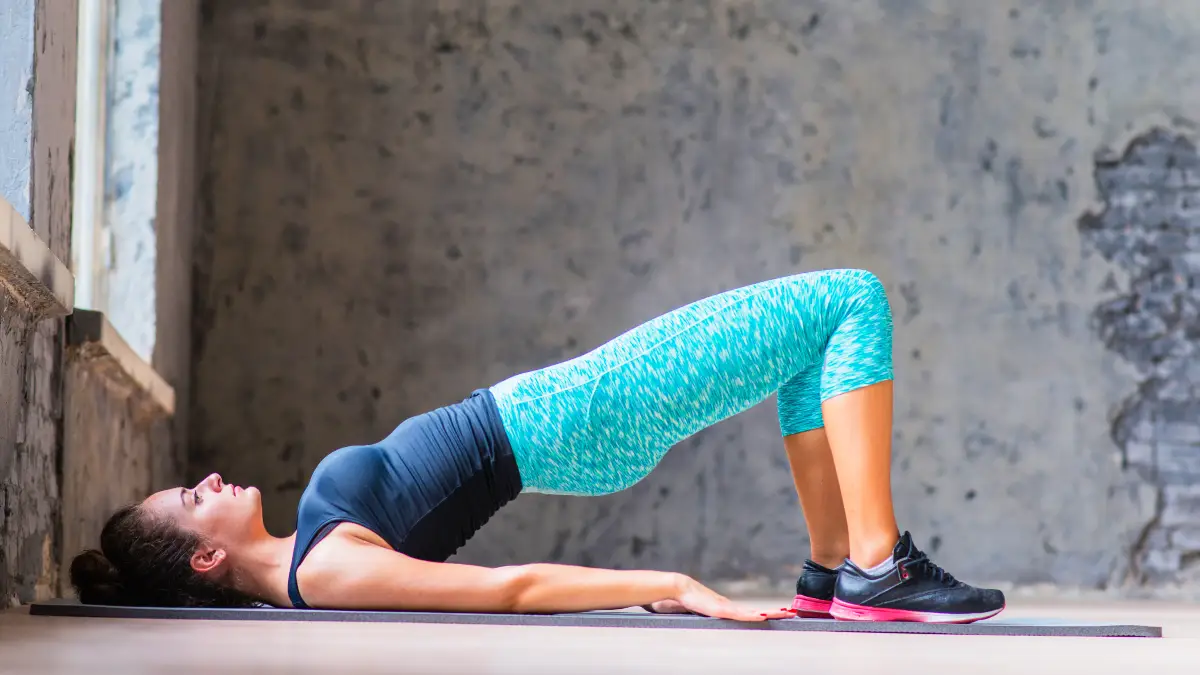
When doing a standing overhead press, many people lean back and arch their lower back a lot as they push the weight up. This turns a shoulder exercise into a standing incline press, which uses more of your chest.
Leaning back is usually a sign that you don’t have enough mobility to press straight overhead. Your upper back might be stiff, or your shoulders might not be flexible enough. So, you arch your back to get the barbell over your head.
This arch puts a lot of bad pressure on the joints in your spine. It can cause low back pain and, over time, even stress fractures in your vertebrae. If you can’t do this move without arching, it’s a sign of a bigger movement problem that can put you at risk in other overhead activities.
A safe overhead press needs a stiff, stable torso and a straight bar path.
Squeeze Your Glutes and Core: The best way to stop arching is to create tension through your whole body. Before you press, squeeze your glutes hard and brace your abs. Think about “pulling your ribcage down” to keep your pelvis neutral and your back flat.
Keep the Bar Path Straight: The bar should move straight up. To do this, you have to move your head. As the bar leaves your shoulders, tuck your chin and pull your head back. Once the bar passes your face, push your head forward “through the window” your arms create. You should finish with the bar directly over your spine and your biceps next to your ears.
Work on Mobility: To fix the root cause, do mobility exercises. You can use a foam roller to improve your upper back mobility. You can also do stretches to improve your shoulder’s range of motion.
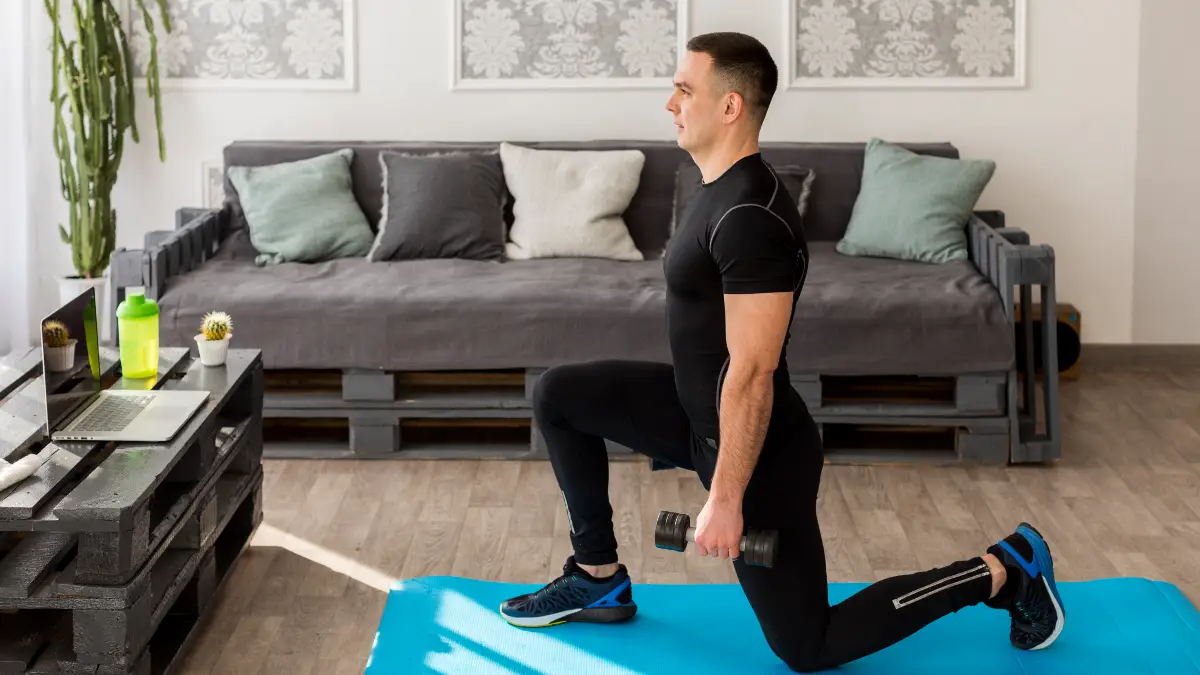
5. The Lunge: Bad Knee Alignment
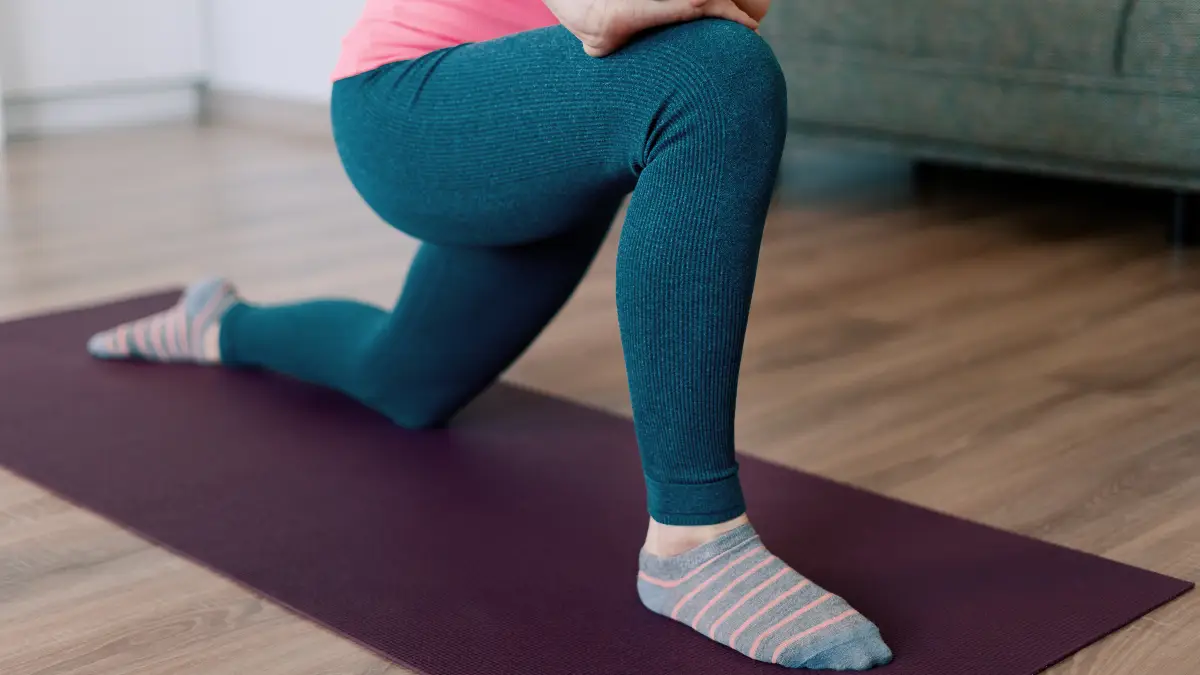
Common mistakes during a lunge include letting the front knee cave in, letting it go too far past your toes, or leaning your body too far forward. These mistakes make you unstable and put stress on your knee.
The risks of bad lunge form are like a bad squat, but worse because you’re on one leg and less stable. If your knee collapses inward, it puts a twisting stress on the joint. This can strain ligaments and increase your risk of an ACL injury.
If your knee goes too far past your ankle, it puts extra strain on your patellar tendon. These mistakes often lead to “runner’s knee,” which is a dull ache around your kneecap. Sports with a lot of lunging, like fencing, have high rates of these knee injuries.
A good lunge is all about control, stability, and proper alignment.
Keep Your Torso Upright: Think about dropping your hips straight down, not pushing them forward. Keep your chest up and your core tight to stay upright.
Align Your Knee Correctly: Your front knee should always track in line with your front foot. At the bottom of the lunge, it should be right above your ankle. The knee of your back leg should point straight down to the floor.
Use the Right Stance: Take a big enough step so that both knees can bend to about 90 degrees. This helps spread the stress evenly between both legs.
Distribute Your Weight: To use your glutes and hamstrings and take pressure off your knee, keep your weight in the midfoot and heel of your front foot.
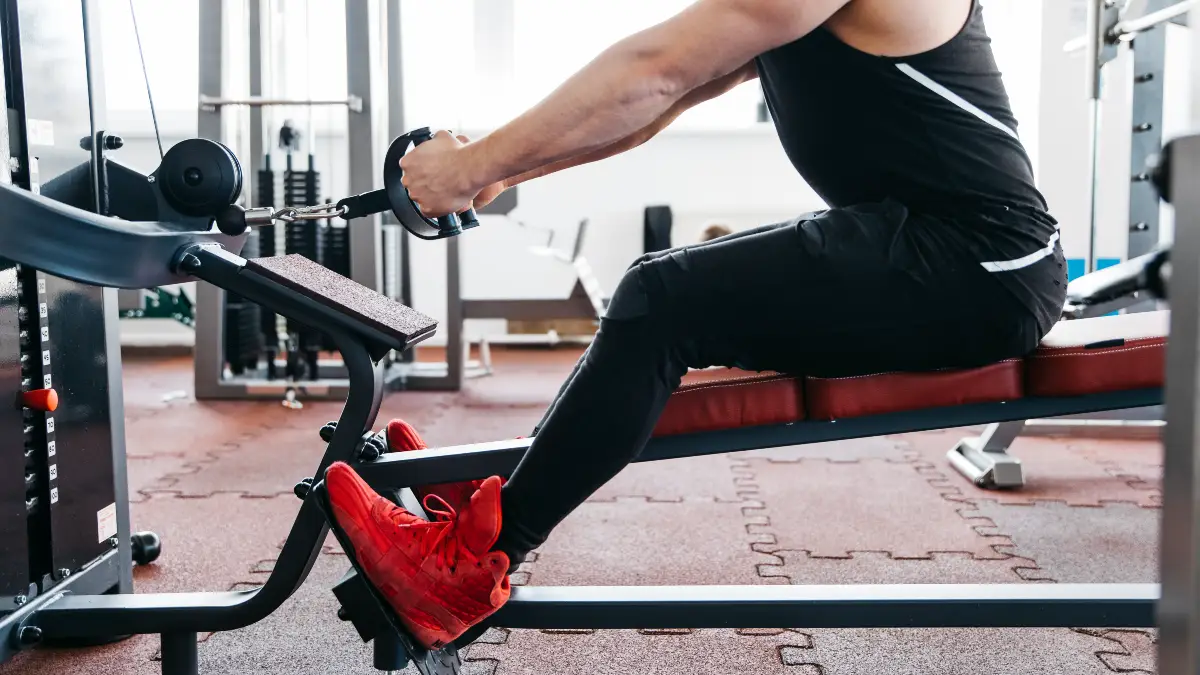
6. The Barbell Row: Using Your Arms and Rounding Your Back
Two big mistakes ruin the barbell row. The first is starting the pull with your biceps instead of your big back muscles. The second is letting your back round instead of keeping it flat.
Pulling with your arms turns a great back exercise into a bad bicep curl. It means your lats, rhomboids, and traps don’t do the work, which defeats the purpose of the exercise.
More importantly, rowing with a rounded lower back puts the same dangerous forces on your spine as a rounded-back deadlift. This greatly increases your risk of back strains and long-term disc injuries.
A good row starts with a stiff torso and pulling with the right muscles.
Start With Your Back: Think of your hands and arms as just hooks. The movement should start by squeezing your shoulder blades together hard. A great cue is to “drive with your elbows,” pulling them up and back toward the ceiling. Keep them close to your body instead of flaring them out.
Keep Your Spine Stiff and Flat: Your setup is key. Hinge at your hips to set your torso angle, and make sure your spine is straight from your head to your tailbone. Brace your core to lock this position in for the whole set. Your torso should not move much.
Control the Weight: Don’t use momentum or jerk the weight. The lift should be slow and controlled, both on the way up and on the way down. A controlled lowering phase works the muscle more and helps you keep your back safe.
7. The Push-Up: Sagging Hips and Flared Elbows

The push-up is often done wrong in two main ways. First, people let their hips sag, which arches the lower back. Second, they flare their elbows out to the sides, making a 90-degree angle with their body.
Sagging hips show that your core isn’t engaged. This puts your lower back in a hyperextended position, which can lead to back pain. Flared elbows are just as dangerous here as in the bench press.
It puts your shoulder in a weak position that can lead to shoulder impingement over time. These mistakes turn a great full-body exercise into something that can strain your joints and spine.
A good push-up is like a moving plank. It requires tension through your whole body and correct joint alignment.
Make a Stiff Plank: Before you go down, get into a solid plank position. Do this by bracing your core and squeezing your glutes hard. This locks your pelvis in place and stops your hips from sagging. Your body should be in a straight line from your head to your heels.
Tuck Your Elbows: Your elbows shouldn’t flare out to make a “T” shape. Instead, tuck them closer to your body, at about a 45-degree angle. Think of making an “arrow” shape with your head and arms.
Position Your Hands and Shoulders: Place your hands slightly wider than your shoulders, at chest level. To make your shoulders even more stable, imagine “screwing your hands into the ground.” This helps put your shoulder in the right spot in its socket.
8. The Plank: Hips Too High or Too Low
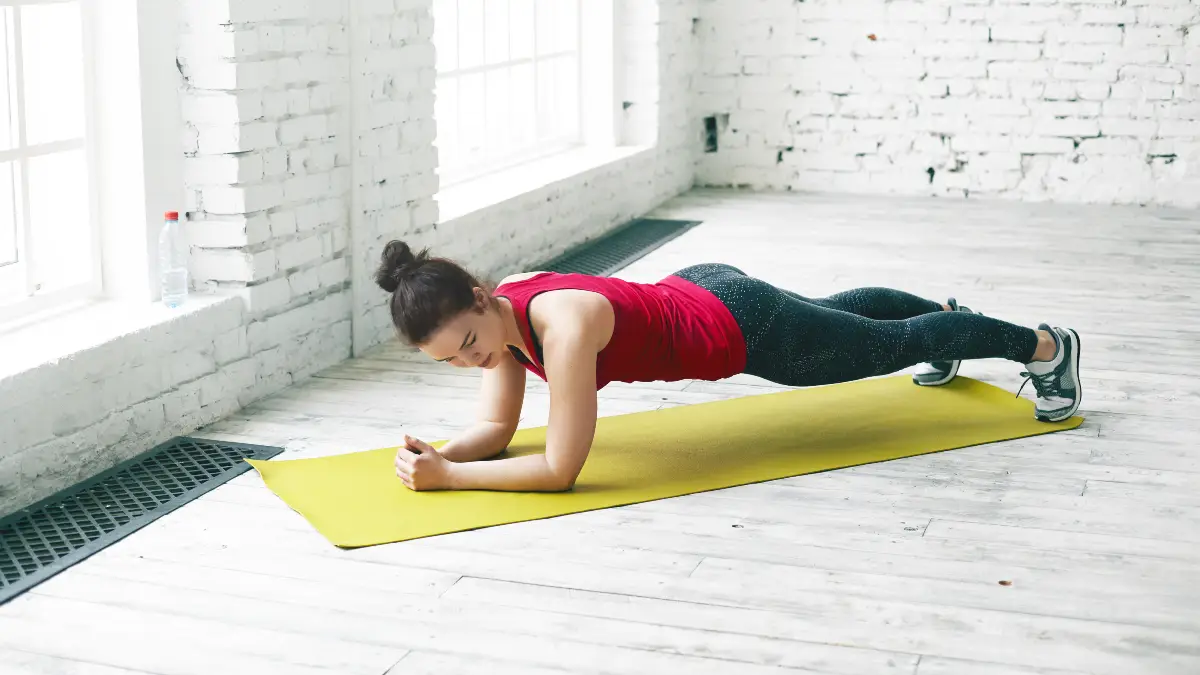
The two most common mistakes in a plank are pushing your hips up too high (like an inverted ‘V’) or letting them sag too low, which arches your back.
Both mistakes defeat the purpose of the exercise. Pushing your hips up takes the work off your core and puts it on your shoulders. Sagging hips happen when your core gets tired.
This lets your lower back arch, which can compress the joints in your spine and cause back pain.
While there aren’t many stats on plank injuries, studies show that poor core endurance is linked to a higher risk of lower back pain. The quality of your plank is much more important than how long you can hold it.
A perfect plank is about total-body tension and a straight line.
Squeeze Your Core and Glutes: To stop your hips from piking or sagging, create tension in your midsection. Pull your belly button in, brace your abs, and squeeze your glutes hard. Also, tuck your tailbone under slightly to keep your lower back flat.
Keep a Straight Line: Your goal is to make a perfectly straight line from your head to your heels. A good trick is to have someone place a broomstick on your back. It should touch your head, upper back, and tailbone.
Secure Your Shoulders: In a forearm plank, your elbows should be right under your shoulders. In a high plank, your hands should be right under your shoulders. In both, actively push the floor away to spread your shoulder blades apart. This makes your shoulders more stable.
Focus on Quality, Not Time: The exercise is over as soon as your form breaks. It’s much better to do several short, perfect planks than one long, sloppy one.
9. The Bicep Curl: Swinging the Weight
A very common mistake in the bicep curl is using momentum. This is when you use your back and shoulders to swing the weight up, instead of just using your bicep strength.
Swinging the weight ruins the point of an isolation exercise. It takes the tension off your biceps, which means you get less muscle growth. This “cheating” form can also cause injury. The swinging motion often involves a jerky movement in your lower back, which can strain it. The uncontrolled lift can also put stress on your shoulder and elbow joints.
A good bicep curl is all about strict control and isolating the muscle.
Isolate the Biceps: The only joint that should move is your elbow. Your upper arms should stay pinned to your sides for the whole rep. If your shoulder or back moves, you’re using momentum.
Create a Stable Base: To stop your body from swinging, stand with your feet shoulder-width apart, knees slightly bent, and core braced. This gives you a solid foundation.
Control the Speed: The movement should be slow and controlled, especially on the way down. Resisting gravity on the way down for 2 to 3 seconds creates more time under tension, which is great for muscle growth.
Use the Right Weight: If you have to swing, the weight is too heavy. Lower the weight so you can lift it with strict, controlled form.
10. The Kettlebell Swing: Squatting Instead of Hinging

The biggest mistake in the kettlebell swing is doing a squat instead of a hip hinge. This looks like bending your knees a lot and dropping your hips down, instead of pushing your hips back with only a small knee bend.
The power of a kettlebell swing comes from a strong hip thrust, which is a horizontal movement. A squat is a vertical movement, so it’s very inefficient for a swing.
It forces you to use your arms and shoulders to lift the kettlebell, which is not the point of the exercise. This squat-style swing also often causes the lower back to round, which puts dangerous forces on the spine.
The risk is even higher with the “American” swing, where the kettlebell goes all the way overhead. Research shows this can cause the lower back to arch too much.
The kettlebell swing is all about the hip hinge. Mastering this is key for safety and results.
Master the Hip Hinge: The swing is powered by pushing your hips straight back, not down. Your back should stay flat, and your shins should stay almost vertical.
Follow Professional Standards: Kettlebell groups like StrongFirst have clear rules for a safe swing. Keep your spine neutral, “pack” your shoulders by using your lats, hike the kettlebell high between your legs, and drive your hips forward hard until your body is a stiff “standing plank” at the top.
Power From Your Hips: Your arms should be like ropes, and your hands like hooks. All the power comes from your glutes and hamstrings. In a good swing, the kettlebell should feel like it’s floating up to chest height on its own.
11. The Leg Press: Locking Your Knees
A big safety mistake on the leg press is forcefully straightening your legs and locking your knees at the top of the movement. This means pushing the joint into a rigid, straight position under a heavy load.
When you lock your knee, the weight transfers from your muscles to the joint itself—the bones, cartilage, and ligaments. This puts your knee at risk of hyperextension, where it bends backward too far.
Under a heavy leg press load, this can be a disaster. It can lead to severe sprains or even a complete tear of your ACL and PCL ligaments. This is one of the worst injuries you can get in a gym.
To stay safe on the leg press, keep tension on your muscles and don’t fully extend your joints.
Stop Before You Lock Out: The main rule is to always keep a slight, soft bend in your knees at the top of the press. Your legs should be almost straight, but never fully locked.
Maintain Constant Tension: By not locking your knees, you keep constant tension on your quadriceps. This not only protects your joint but also helps your muscles grow more.
Control the Movement: The movement should be smooth and controlled, especially on the way down. Don’t let the weight sled slam at the bottom. A controlled descent is safer and more effective.
12. The Abdominal Crunch: Pulling on Your Neck
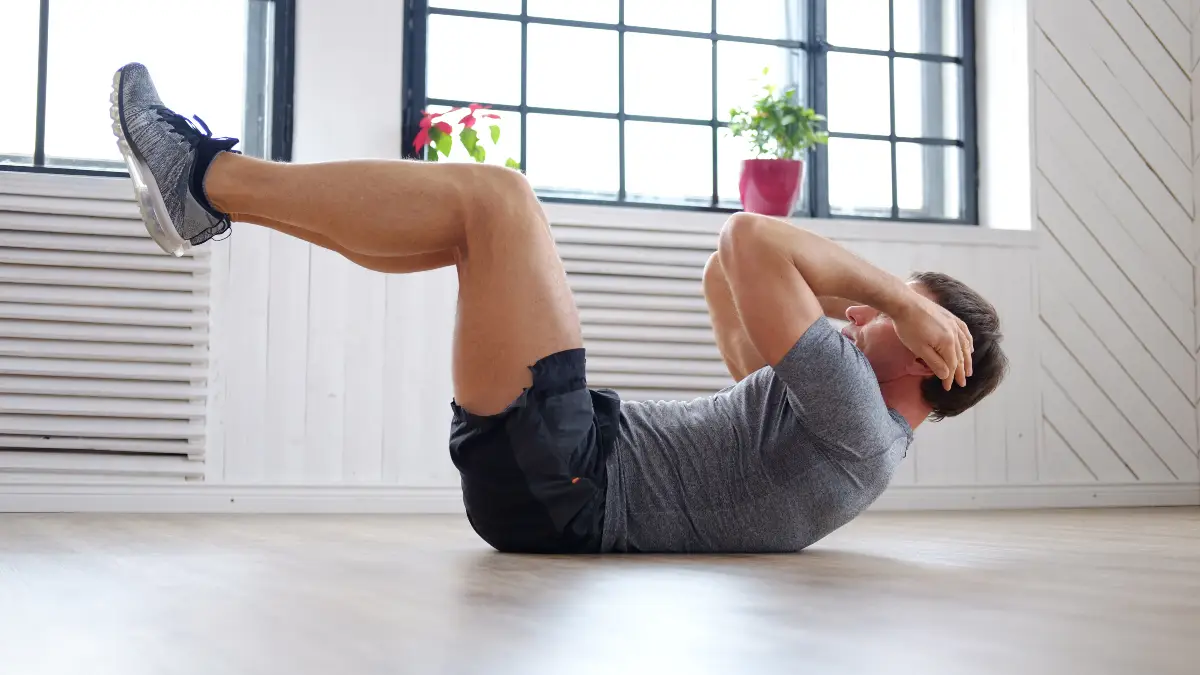
The most common mistake during a crunch is yanking your head and neck forward with your hands. You should be using your ab muscles to lift your upper body.
This mistake puts a lot of strain on your neck muscles and the small bones in your cervical spine. It can lead to neck pain and stiffness.
By using your arms to pull yourself up, you’re also not working your abs properly, which makes the exercise less effective. Sometimes, neck pain during crunches can be a sign of an underlying problem, like a bulging disc in your neck.
A good crunch works your abs while keeping your neck relaxed and straight.
Place Your Hands Correctly: To stop yourself from pulling on your head, change your hand position. Instead of locking your fingers behind your head, gently place your fingertips behind your ears with your elbows out. You can also cross your arms over your chest.
Keep Your Neck Neutral: Your neck should stay in a straight line with your spine. A good cue is to keep a space the size of a fist between your chin and your chest. Look up at the ceiling, not at your knees.
Start With Your Core: A crunch is a “curl” of your upper body, not a lift of your head. Start the movement by squeezing your abs hard to lift your shoulder blades off the floor. Your head and neck should just follow along. Exhaling as you lift can help you get a stronger ab contraction.
13. Treadmill Use: Holding Handrails & Heel Striking

Two common bad habits on the treadmill are holding the handrails for support and overstriding, which causes you to land hard on your heel.
Holding the handrails messes up your natural walking and running form. It makes you hunch over or lean back and reduces how many calories you burn by up to 25%. It also stops your body from learning how to balance itself.
Overstriding and landing on your heel creates a braking force with every step. This sends a shock up your leg and is linked to injuries like shin splints, knee pain, and hip problems.
Good treadmill form means you should run as naturally as possible.
Go Hands-Free: The most important fix is to let go of the handrails. Let your arms swing naturally from your shoulders. If you feel like you need to hold on, the speed or incline is too high. Lower them until you can keep your balance without help. The handrails are only for getting on and off safely.
Improve Your Steps: To stop overstriding, try to take more steps per minute. Shorter, quicker steps help your foot land under your body, not out in front of it. Aim for a midfoot strike, where your foot lands flat under your hip. This is smoother, more efficient, and reduces stress on your joints.