If you think grueling squats and lunges are the only way to build bulletproof hips, your joints will be relieved to hear you are wrong. Weak hips lead to lower back pain. They cause poor balance and knee strain.
But traditional gym exercises often aggravate the very joints you are trying to heal. Squats can pinch. Lunges can ache. It feels like a trap. You need strength to stop the pain, but the exercises cause more pain.
There is a better way. You can use five specific Norwegian walking techniques to safely fire up your glutes. This method is also known as Nordic pole walking. It helps stretch tight hip flexors and build functional lower body strength in just three weeks.
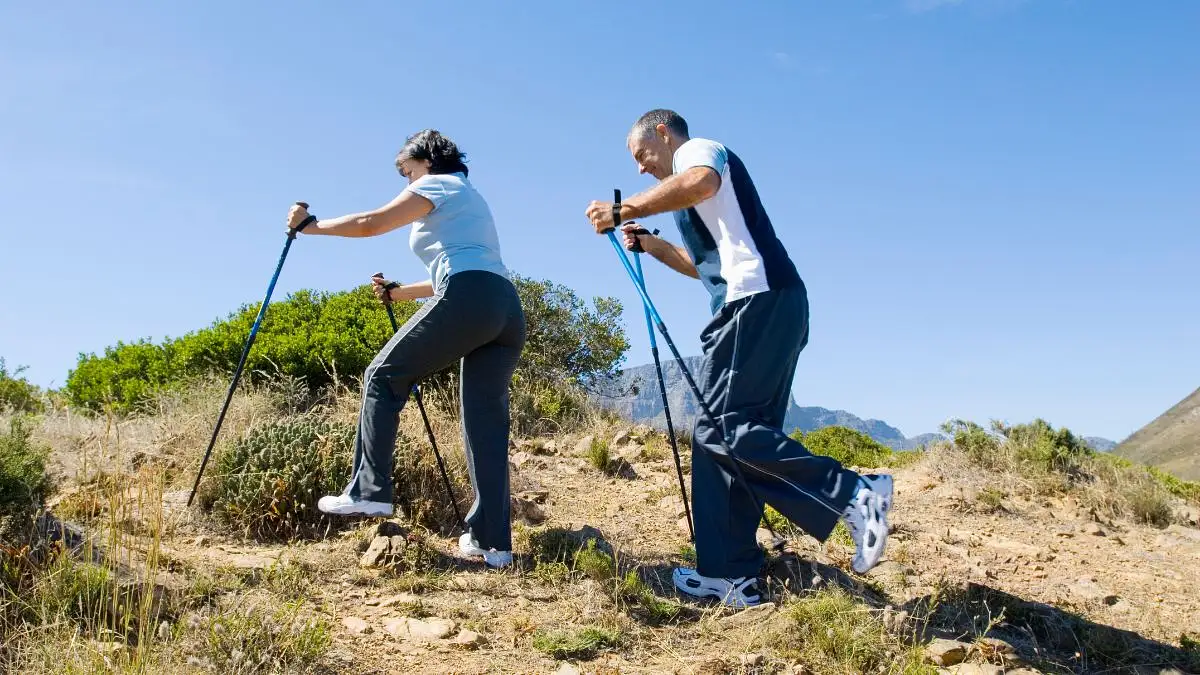
1. The Classic Diagonal Push Off (For Maximum Glute Activation)
If your glutes fall asleep during the day, this first technique is your wake up call. The classic diagonal push off is the foundation of all Norwegian walking techniques.
You swing your opposite arm and leg naturally. But the power comes from actively pushing the pole backward into the dirt. Most people just drag the poles. You need to drive them.
Focus entirely on your trailing leg.
Nordic Walk Protocol
Master Your Walking Form
1. The Plant
Plant the pole firmly behind your body, ensuring it is angled to provide maximum leverage.
2. Stay Tall
Keep your upper body tall and upright to prevent lower back compensation and maximize stride efficiency.
3. Full Roll
Roll through your foot completely, moving smoothly from the heel to the ball of the foot.
4. The Force
Push through the back toe with force to generate the forward momentum needed for a true Nordic stride.
This forces your hip into full extension. Full extension fires your gluteus maximus directly. You get all the Nordic walking benefits without compressing your spine.
A 2017 clinical trial proved this works better than the gym. Researchers found supervised Nordic walking was actually superior to traditional strength training.
It improved physical function much faster for patients with hip osteoarthritis (Bieler et al., 2017). You can rebuild hip strength safely while getting fresh air.
Form Check: Keep your elbows relaxed. The power comes from your shoulder and hip, not your triceps.
2. Uphill Pole Power Walking (The Hamstring and Hip Extensor Builder)

While the diagonal stride builds foundational strength, taking that same technique uphill changes the game completely. Weak hamstrings often cause hip instability. Walking up a hill fixes this fast.
Find a moderate incline. A 10 percent to 15 percent grade works best.
- Plant your poles in front of your body.
- Use the poles to drive your body forward and upward.
- Keep your chest lifted. Do not hunch over the poles.
- Squeeze your glutes as you step up.
The incline naturally forces your hip extensors to lift your body weight. This creates a powerful resistance workout. It stays completely gentle on your knees. These are the perfect low impact hip exercises for sensitive joints.
Biomechanical research shows exactly why this works. Uphill pole walking increases oxygen uptake by 22.6 percent over normal walking.
It also significantly spikes gluteus maximus and hamstring activation compared to walking on a flat surface (Pellegrini et al., 2015). You get more muscle growth with every single step.
Form Check: If you feel this in your lower back, your stride is too short or you are leaning too far forward.
3. Elghufs (Norwegian Moose Hoofing for Hip Power)
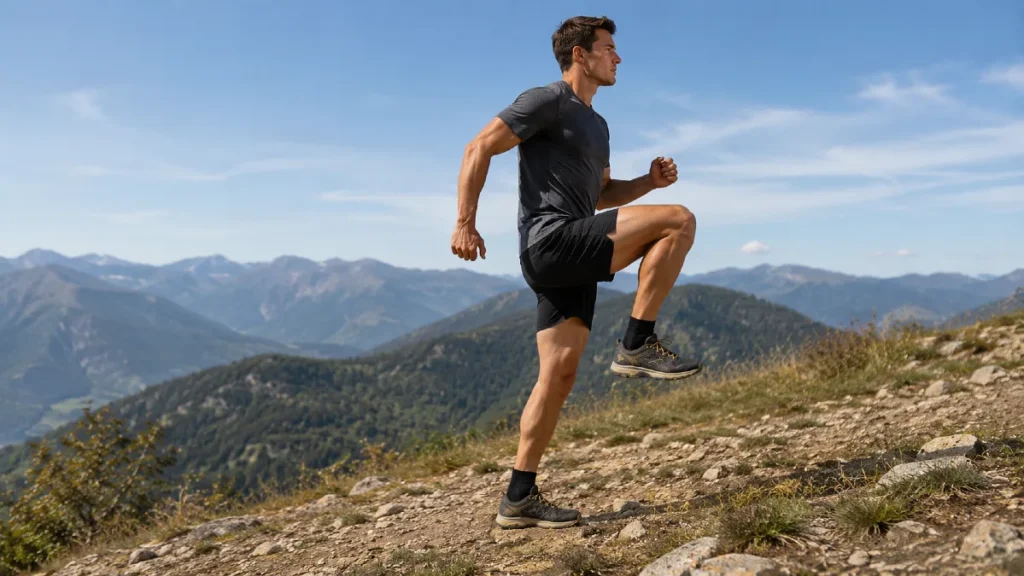
Now we move from basic walking to athletic power. Elghufs is a traditional Norwegian cross country ski training method. You do it on foot with your poles.
Do not let the funny name fool you. This technique builds explosive hip power without the deep knee bending of a jump squat. You do not have to literally jump. Bounding can simply mean a highly exaggerated and powerful skip that lifts your chest.
Nordic Skip Protocol
Plyometric Walking Mastery
1. Gentle Launch
Start with a gentle walking skip, focusing on the fluid transition from step to leap.
2. Rhythmic Drive
Drive the poles firmly into the ground to build the rhythm required for the skip phase.
3. Catch Air
Push off hard enough to catch a tiny bit of air, engaging your explosive leg power.
4. Soft Landing
Land softly to protect your joints, immediately rolling into the next skip for continuous movement.
This bounding motion forces your hips to absorb and generate force quickly. It is a fantastic progression. You transition from simple rehabilitation to true functional power.
Using these advanced Norwegian walking techniques makes your hips resilient against sudden trips or falls.
4. Resistance Pole Marching (For Deep Pelvic Stabilization)
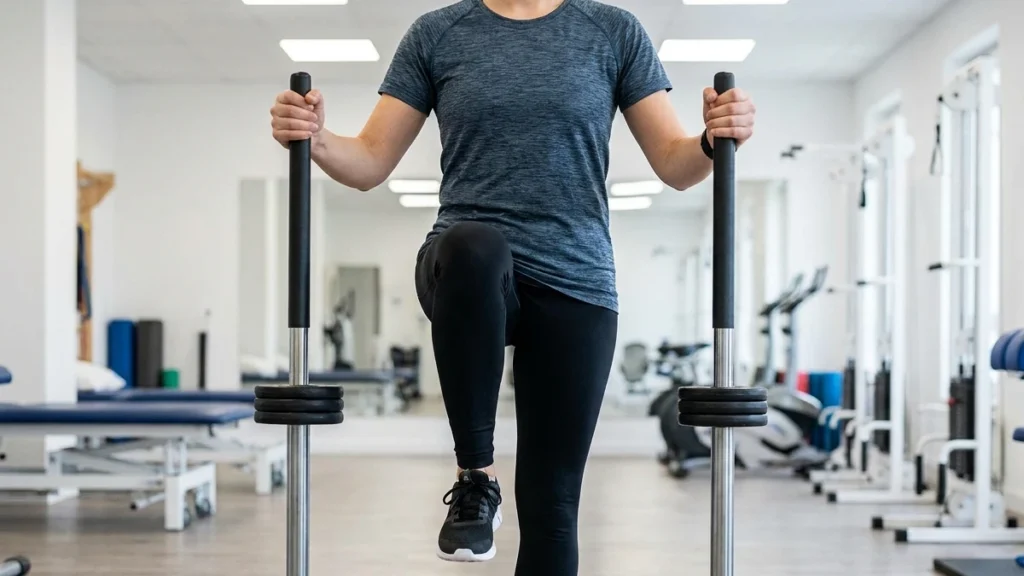
If your hips constantly drop or shift when you walk, your side hip stabilizers need work. Standard fixed length carbon fiber poles are great for basic stability. But swapping them out changes everything.
You can use shock absorber poles. Brands like BungyPump feature built in elastic resistance. You literally push down against 4kg to 10kg of pressure with every step.
- Grip your resistance poles firmly.
- Walk with a slightly higher knee lift like a march.
- Push the poles straight down into the ground.
- Keep your hips perfectly level.
Pushing down against that elastic resistance forces your core to engage. It makes your gluteus medius fire constantly. This is your side hip stabilizing muscle. It works hard to keep your pelvis level.
Marching with resistance shock absorber poles safely increases lower limb strength. It also improves balance in older adults within just 8 weeks (Marciniak et al., 2020).
You can rebuild hip strength and improve your balance at the same time. These specific Nordic walking benefits are hard to replicate in a gym.
5. The Long Stride Hip Hinge (For Mobility and Pain Relief)

Tight hip flexors pull your pelvis forward. This causes severe lower back tightness. The long stride hip hinge fixes this posture while you walk.
Most people shuffle when their hips hurt. You need to do the exact opposite.
Nordic Stride Protocol
Optimize Your Walking Form
1. Lengthen the Stride
Lengthen your walking stride by 10 percent to 20 percent to maximize forward coverage and engagement.
2. Ankle Lean
Lean from the ankles like a ski jumper to maintain your center of gravity while driving forward.
3. Protect the Back
Do not bend from your lower back. Keep your core engaged to prevent strain during the extension phase.
4. Maintain Alignment
Keep a straight line from your heel to your head to ensure the most efficient transfer of energy through your kinetic chain.
This forward angle combined with a longer stride does two things. It dynamically stretches tight hip flexors. It also forces your glutes to work much harder to stabilize your torso. This is one of the best low impact hip exercises for pain relief.
A 12 week study of adults with chronic joint pain proved this. Researchers found 91 percent of subjects experienced a reduction in hip, knee, and back pain. They were also able to walk much further distances (Silverberg, 2016).
Form Check: If you feel a sharp pull in your groin, reduce your stride length slightly until your flexibility improves.
Quick Reference: Techniques and Benefits
| Technique | Primary Muscle Targeted | Main Benefit |
| Diagonal Push Off | Gluteus Maximus | Builds basic hip strength |
| Uphill Power Walking | Hamstrings and Glutes | Increases muscle growth |
| Elghufs Bounding | Full Hip Complex | Develops explosive power |
| Resistance Marching | Gluteus Medius | Stabilizes the pelvis |
| Long Stride Hinge | Hip Flexors | Relieves joint pain |
Conclusion
Squats are not mandatory for strong hips. Traditional gym routines can actually set you back if your joints are already screaming.
By mastering the diagonal push off, utilizing inclines, trying Elghufs, using resistance poles, and lengthening your stride, you can rehabilitate your hips safely.
You have the data. You have the exact steps. Now you just need the gear.
References
- Bieler et al. (2017). Nordic Walking vs. strength training for hip osteoarthritis function. Scand J Med Sci Sports, 27(8), 873–886. https://doi.org/10.1111/sms.12694
- Marciniak et al. (2020). Nordic Walking with resistance shock absorber poles on functional fitness in women 60+. Int J Environ Res Public Health, 17(7), 2197. https://doi.org/10.3390/ijerph17072197
- Pellegrini et al. (2015). Muscle activation during Nordic Walking vs. uphill walking. PLOS ONE, 10(9), e0138906. https://doi.org/10.1371/journal.pone.0138906
- Silverberg (2016). Nordic Pole Walking effect on chronic low back, hip, and knee pain and walking distance. Int J Phys Ther Rehabil, 2, 122. https://doi.org/10.15344/2455-7498/2016/12