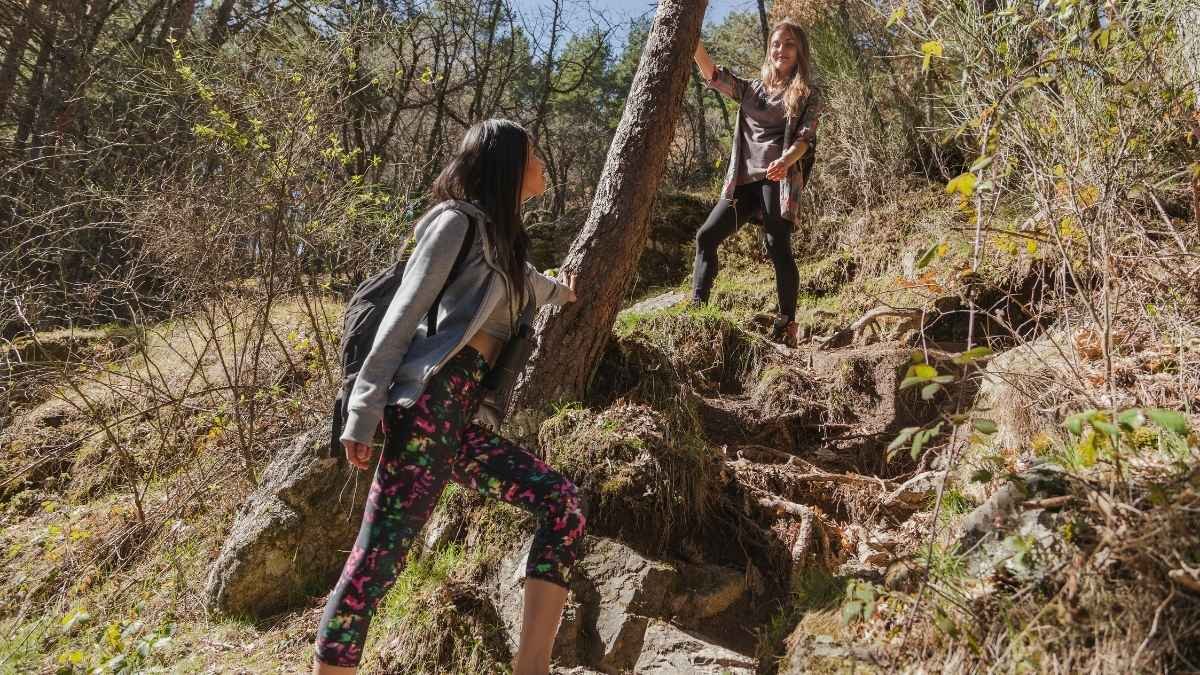
That stunning trail photo on your feed is a beautiful lie. It sells you a perfect day, a casual adventure. It doesn’t show the invisible, deadly current in that “perfect” swimming hole. It doesn’t warn you about the 30-degree temperature drop in the space of an hour, or the optical illusion that makes a 10-mile trek look like a simple walk.
These are America’s most deceptive trails. They aren’t the ones that scream “danger”; they’re the ones that whisper “welcome.” They are masters of the false first impression, luring millions of hikers into lethal situations. Their greatest trick is making you feel safe.
This isn’t just another list. We’re dissecting the psychology of these deadly designs—how they exploit your confidence and blind you to the real risk. This is the survival guide for the hikes that kill the unprepared.
1. Bright Angel Trail
What Makes It Look So Easy?
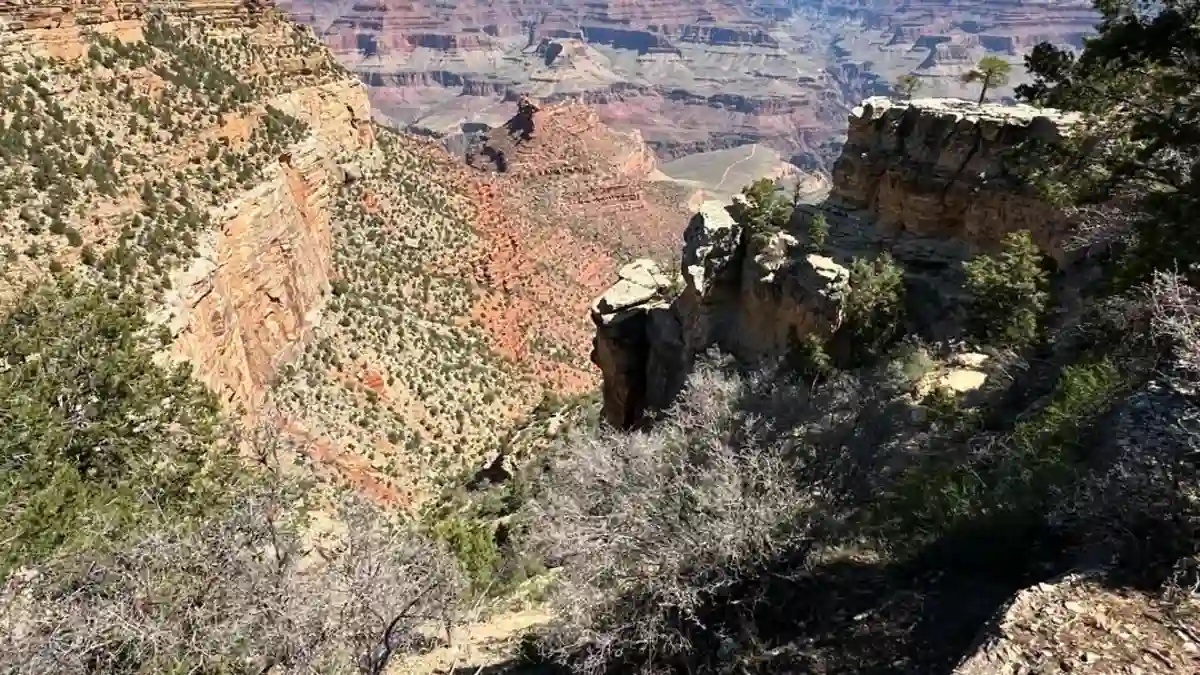
The Bright Angel Trail is the Grand Canyon’s big welcome mat. It is the most popular trail in the park and is kept in great shape.
It is wide and smooth enough for mules, so it feels “fairly easy to walk down.” This easy start is its first and biggest trick. The trail has things that create a false sense of safety, like resthouses, toilets, and even drinking water in the summer.
For new hikers, these things make it feel like a city park, not a dangerous wilderness. As you walk down, the views are so amazing that you often don’t notice how far you have gone. You forget that you have to climb all the way back up.
What’s the Real Danger?
The main danger of the Bright Angel Trail is simple. The easy walk down makes you feel confident. It encourages you to go deeper into the canyon than you should.
The trip back up is “far more difficult.” It is a long uphill battle that takes at least twice as much time and energy as the walk down.
This hard climb is made worse by a deadly heat trap. For every 1,000 feet you go down, the temperature goes up by about 3.5 to 5.5°F. This means the inner canyon can be 20-30°F hotter than the rim.
Summer temperatures there are often over 100°F in the shade. This extreme heat turns the climb out into a fight against the Grand Canyon’s main killers: heatstroke and lack of water. There is also a strange danger called hyponatremia.
This happens when you drink too much water but don’t eat enough salt to replace what you lose from sweating. It can be deadly. A new hiker, focused only on drinking water, would never think of it.
The very things that make the trail seem safe—the wide path and water stops—actually make it more dangerous. They attract lots of unprepared hikers who think these features guarantee their safety.
A Story You Don’t Want to Be Yours
The story is sadly common. A hiker feels great and loves the views. They walk down past the first resthouse, then the second, maybe even farther.
The walk down is nice. But when they turn around to climb out in the hot sun, the trouble starts. The trail becomes a furnace. They run out of water faster than they thought.
Their body, not used to the heat and hard work, starts to give up. They feel dizzy and sick. These are the first eat exhaustion.
If they don’t stop, find shade, and get water and salt right away, it can turn into heatstroke. This is an emergency where the body gets so hot it can kill you. A 36-year-old man died from heatstroke on the trail in June 2015. It is a sad reminder of this constant danger.
How to Hike Bright Angel Trail Safely
- Location: Grand Canyon National Park, Arizona
- Length (to Havasupai Gardens): 9 miles (14.4 km) roundtrip
- Elevation Change: 3,040 feet (925 m)
- Key Dangers: Heatstroke, Dehydration, Hyponatremia, Exhaustion
- Important Fact: The climb up takes at least twice as long as the walk down. The park service warns you not to hike from the rim to the river and back in one day.
Your Survival Guide
- Follow the Golden Rule: Park rangers say, “Going down is optional, coming up is mandatory.” Know your limits. Turn around before you feel tired.
- Hike by the Clock, Not the Mile: In summer, do not hike between 10 a.m. and 4 p.m. Start your hike at sunrise or earlier to avoid the worst heat.
- Drink and Eat Smart: Carry and drink lots of water. Also, eat salty snacks like pretzels or trail mix. This helps replace salt and stops hyponatremia.
- Dress for the Desert: Wear a wide hat, sunglasses, and light-colored, loose clothes. Getting a bandana or shirt wet can help cool you down.
- Use Trekking Poles: Poles can help your knees on the long way down and give you support on the hard climb out.
2. Abrams Falls, Great Smoky Mountains NP, TN
What Makes It Look So Easy?
The trail to Abrams Falls is found in the popular Cades Cove area of Great Smoky Mountains National Park.
It is a perfect picture of mountain charm. It is called a “not-too-difficult” and “moderate” 5-mile round-trip hike. It attracts many of the families and casual visitors who come to the park.
The path winds nicely next to a creek through a green forest. The end of the trail is a beautiful reward for a small effort: a 20-foot waterfall that pours into a big, calm-looking pool. On a hot day, it looks like the perfect place for a swim.
What’s the Real Danger?
The trick of Abrams Falls is total. The danger is not the trail. It is the waterfall itself. The calm-looking pool at the bottom of the falls is a deadly trap. The huge amount of water falling creates powerful, hidden currents and a strong undertow.
These forces can grab even the best swimmers and pull them under. They can get pinned against rocks or logs with no way to escape. To make it worse, the rocks around the pool are always wet and slippery.
A simple slip near the edge can be a fatal mistake. This trail is a special kind of danger. The hike is just the way to get to a deadly spot. People finish the easy trail, feel good about it, and then let their guard down right when they are in the most danger.
A Story You Don’t Want to Be Yours
The history of Abrams Falls is full of sad stories. They show that how well you swim does not matter against powerful water. In July 2006, a good swimmer jumped into the water near the falls and was pulled under.
His body was never found. In May 2009, a 20-year-old college student drowned. In April 2004, a 12-year-old student on a school trip slipped on a rock underwater and was lost. These stories are a clear warning.
The beautiful pool is not a swimming hole. It is a natural machine with immense, hidden power.
How to Hike Abrams Falls Safely
- Location: Great Smoky Mountains National Park, Tennessee
- Length: 5.2 miles (8.4 km) roundtrip
- Difficulty: Moderate
- Key Dangers: Drowning, strong undertows, powerful currents, slippery rocks
- Important Fact: Drowning is the top cause of death in the park. There have been 29 water-related deaths on this trail alone since 1971.
Your Survival Guide
- Listen to the Warnings: The advice is simple and clear: Do not swim in the pool at the bottom of the falls. Do not climb on the wet, slippery rocks near the waterfall.
- Respect the Water: Enjoy the waterfall from a safe distance. A park spokesman warned about “all sorts of unknown hazards” at the bottom of streams. Take this very seriously.
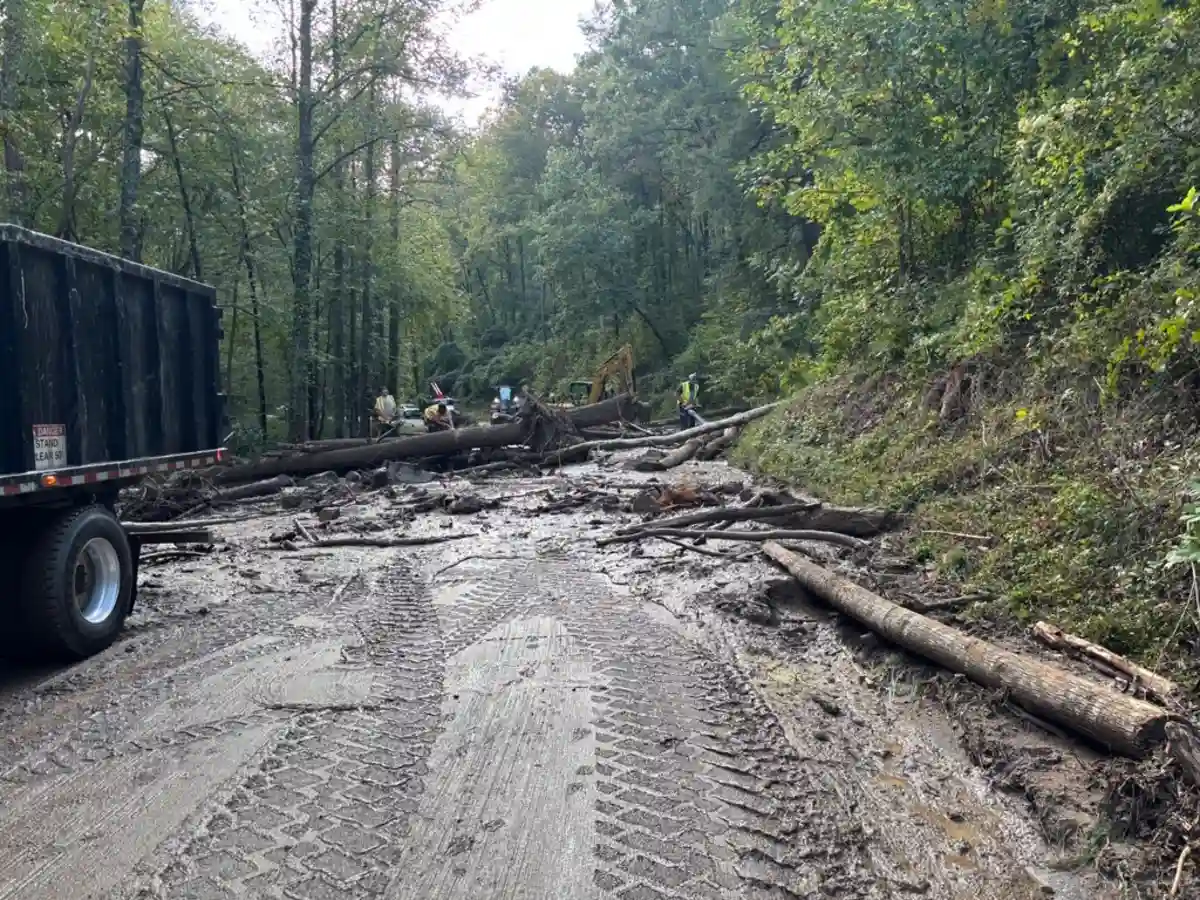
- Be Patient with Crossings: The main danger is the falls, but heavy rain can cause flash floods. If a stream on any trail looks too high, wait. A 1993 story showed that waiting a few hours can save your life.
3. The Maze, Canyonlands NP, UT
What Makes It Look So Easy?
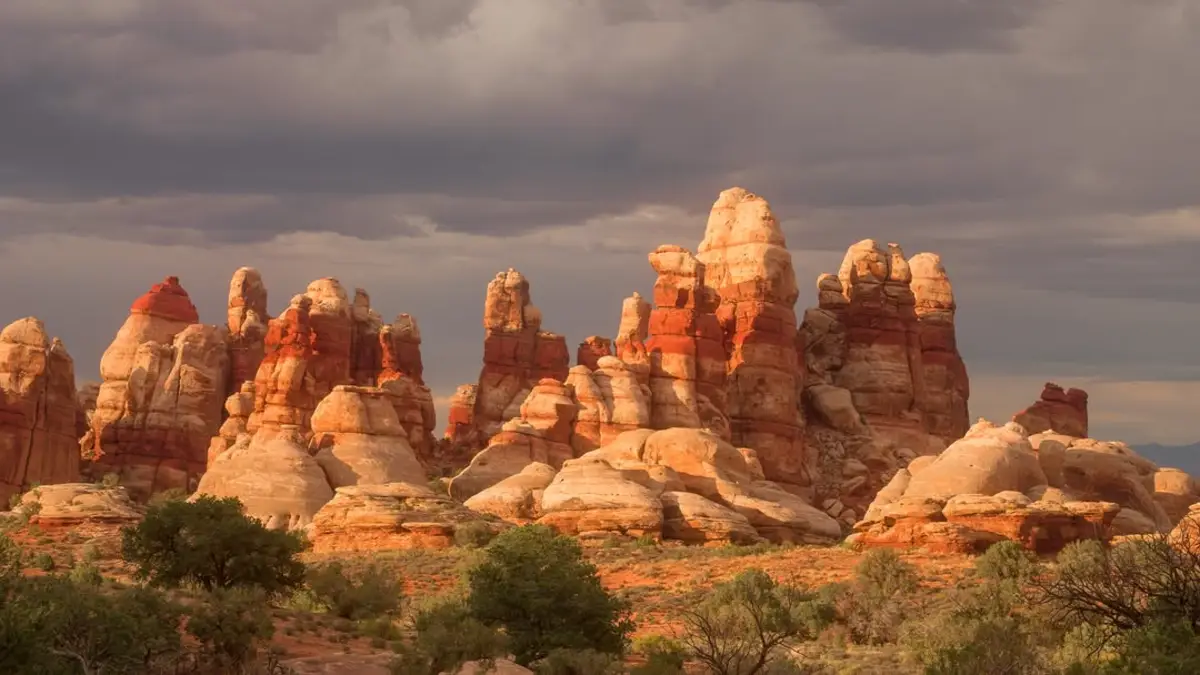
For a very experienced hiker, The Maze in Canyonlands National Park is a top prize. It is the “least accessible” and “wildest” part of the park. It promises a deep and total quiet that is hard to find anywhere else.
The land is a stunning, strange maze of deep, connected canyons. To a skilled desert hiker, the challenge seems to be about finding your way and taking care of yourself. It looks like a good test of skill, not a death trap. The danger seems to be spread out, not in one spot like a cliff.
What’s the Real Danger?
The main danger in The Maze is the land itself. It is designed to make you lost. The “sandstone corridors all look eerily similar.” This makes it very easy to lose your way and walk in circles for hours.
Getting lost here is not a small problem; it is a huge one in a place with no room for mistakes. This problem is made worse by how far away it is. It is a 3- to 6-hour drive in a 4-wheel-drive truck from the nearest ranger station.
There is no clean water, no cell phone service, and summer temperatures can be over 100°F. In The Maze, you have to rescue yourself. Getting lost is often a death sentence. The land itself plays tricks on your mind.
It uses its sameness to break your confidence and ability to make good choices. The trick is that the trail looks like a simple walk through canyons. The reality is that it is a fight against your own mind.
A Story You Don’t Want to Be Yours
The story of adventure blogger Mindy on the Move shows how fast things can go wrong. Her group of experienced hikers made one wrong turn. They followed what looked like trail markers, but they started to have doubts.
As they went deeper into the wrong canyon, they got upset and frustrated. This made it harder to think clearly. They climbed to high spots to get a better view but only saw more of the same confusing land.
The only good sign was the road they drove in on far away. It was a “glimmer of hope” that they were not completely lost. Their hard time, which included one person getting sick from the heat, shows how The Maze punishes even the smallest mistake.
How to Hike The Maze Safely
- Location: Canyonlands National Park, Utah
- Remoteness: A 2.5-hour drive on a dirt road to a ranger station, then another 3 to 6 hours in a special 4WD truck to reach the canyons.
- Key Dangers: Getting lost, lack of water, heat sickness, being very far from help.
- Important Fact: There is no good water and no cell service. You must bring everything you need and be able to rescue yourself.
Your Survival Guide
- Experts Only: This area is not for casual hikers. Only expert desert hikers who know how to find their way should try it.
- You Need a Special Truck: A high-clearance, low-range 4WD truck is required. Do not try to go without one.
- Have Backup Navigation: Do not count on just one tool. You need detailed maps, a compass, and a GPS or satellite phone with the routes already downloaded. Most important, you must be an expert at using all of them.
- Water is Everything: Carry all the water you will need for your whole trip, plus extra for emergencies. There is no drinking water in The Maze.
- Share Your Plan: Leave a detailed plan with someone you trust. Set a time to check in with them.
4. Mount Washington
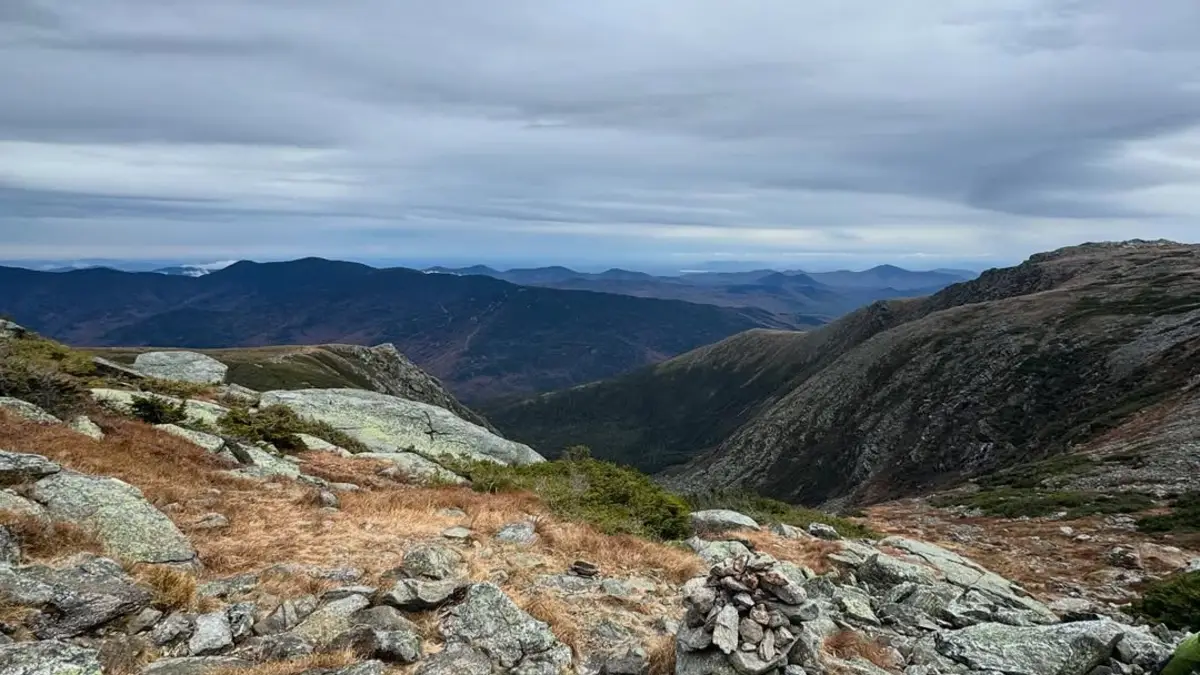
What Makes It Look So Easy?
At just 6,288 feet, New Hampshire’s Mount Washington does not seem like a huge mountain. Its easy access is a big part of its appeal and its trick. You can get to the top by car on the Mount Washington Auto Road or by train.
This creates a friendly feel at the top, which even has a cafeteria. This, plus its location in the busy Northeast, makes people think the mountain is “tamed.” For a fit hiker on a clear summer day, the hike can feel like a hard but doable day trip, not a brush with one of America’s deadliest peaks.
What’s the Real Danger?
The gentle look of Mount Washington on a calm day is a weather trick. The top of the mountain is where major storm paths meet. This special spot gives it the name of having “the worst weather in the world.”
The numbers are hard to believe. The fastest wind speed ever measured on Earth’s surface, 231 mph, was recorded here. Winds are stronger than a hurricane (75 mph) on more than 100 days each year.
The real danger is not just how bad the weather is, but how fast it can change. A nice, sunny day at the start of the trail can turn into a deadly, zero-visibility blizzard in minutes.
This sudden change catches hikers unprepared. It leads to them getting lost and getting hypothermia, which is when your body gets dangerously cold. This is the mountain’s main killer.
This is a trap for our brains. We tend to think a disaster is not likely because it is not something we see every day. A hiker starting in 70°F sunshine cannot imagine a 30°F temperature drop and 80 mph winds an hour later. So, they do not prepare for it.
A Story You Don’t Want to Be Yours
Since 1849, over 150 people have died on Mount Washington. The victims show how tricky the mountain is. They range from “woefully underprepared beginners to expert hikers with decades of experience.”
A common story involves a hiker dressed for a summer day—shorts, a t-shirt, light shoes. They climb above the trees, and the weather turns. The wind picks up, clouds come in, and the temperature drops fast.
Rain turns to sleet, then snow. In the whiteout, they get lost and cannot find the trail. Without proper warm and rain gear, their body temperature drops quickly. Soon, hypothermia starts. This leads to confusion, collapse, and death from the cold.
How to Hike Mount Washington Safely
- Location: White Mountains, New Hampshire
- Elevation: 6,288 feet (1,917 m)
- Key Dangers: Hypothermia, Extreme Wind, Sudden Whiteouts, Falls, Avalanches
- Important Fact: Over 150 people have died here. The top once held the world record for wind speed at 231 mph. The mountain has about 25 rescue missions each year.
Your Survival Guide
- Check the Forecast: The most important safety step is to check the Higher Summits Forecast from the Mount Washington Observatory before you go. Check it again the morning of your hike. If the forecast is bad, do not go.
- Pack for Winter, Even in July: Your backpack must have gear for the worst possible weather, no matter the season. This means a full set of non-cotton layers, a waterproof and windproof jacket and pants, a warm jacket, a winter hat, and gloves.
- Know When to Turn Back: The mountain will always be there. Your ego is the most dangerous thing you can carry. At the first sign of bad weather—more wind, lower clouds, dropping temperatures—turn around right away.
- Stay on the Trail: The trails are marked with rock piles for a reason. In a whiteout, they are your only guide. Do not take shortcuts.
5. Mist Trail
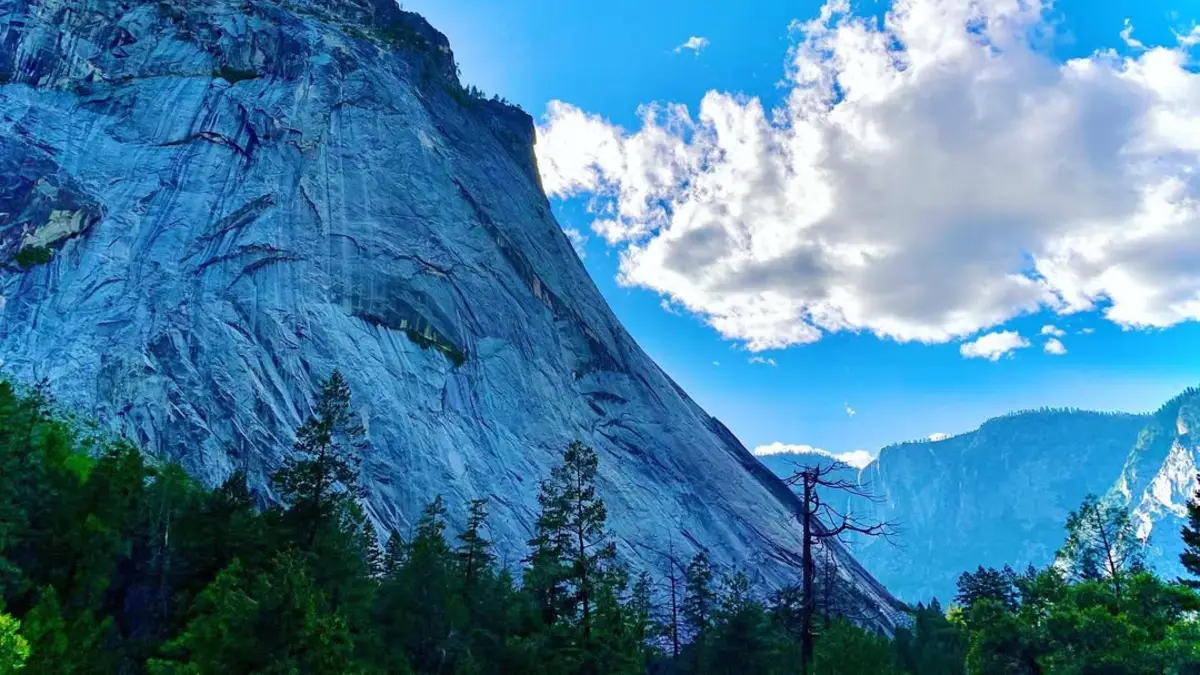
What Makes It Look So Easy?
The Mist Trail is Yosemite National Park’s most famous hike. Millions of visitors hike it each year. It promises a close look at two of the park’s best waterfalls, Vernal Fall and Nevada Fall. The trail starts on a paved, easy path.
The huge number of people on it—from expert hikers to tourists in sneakers—creates a strong feeling of safety. This is a mental shortcut where you assume that if everyone else is doing something, it must be safe.
On the Mist Trail, this can trick you into being careless. It can make you take risks you would never take on an empty trail.
What’s the Real Danger?
The trail’s name is a real warning. As you get near Vernal Fall, you climb a steep granite stairway with over 600 steps. It is always soaked in a heavy mist. These stone steps get very slick. This creates a serious risk of slipping and falling on the hard rock.
But the bigger danger is just a few feet away. The trail runs next to the powerful Merced River, right before it goes over the falls. The idea of cooling off or taking a photo on the wet rocks at the river’s edge has been deadly many times.
The current is fast and the water is freezing. Anyone who slips into the river is almost sure to be swept over the edge. The park even started a project to help make people more aware of the safety risks along this beautiful but dangerous route.
A Story You Don’t Want to Be Yours
The sad story from July 2011 is the best warning for the Mist Trail. Three hikers ignored warning signs and a safety fence. They climbed into the Merced River just 25 feet from the edge of Vernal Fall to take pictures. One person slipped.
The others were pulled in while trying to help. All three were swept over the 317-foot waterfall and died.
This event shows with harsh clearness how a simple bad choice, made for a better photo in a crowded area that seems safe, can have instant and final results.
How to Hike the Mist Trail Safely
- Location: Yosemite National Park, California
- Length (to Nevada Fall top): ~5.4 miles (8.7 km) roundtrip
- Elevation Gain (to Nevada Fall top): ~2,000 feet (610 m)
- Key Dangers: Slips and falls on wet rock, being swept into the river above waterfalls, drowning
- Important Fact: The trail leading to Half Dome, which includes the Mist Trail, has had over 14 deaths in the last 10 years. Many were from being swept over the falls.
Your Survival Guide
- Good Shoes are a Must: Wear hiking shoes or boots with great grip on wet ground. Do not try this hike in sneakers or sandals.
- Use the Railings: Where there are handrails on the stone stairs, use them. Keep three points of contact with the ground or rail when you can.
- Stay Behind Fences: Safety fences are there for a reason. Never cross them.
- The River is Off-Limits: Do not go into the Merced River anywhere above Vernal or Nevada Fall. The rocks are slippery, the current is strong, and the result is deadly.
- Think About the John Muir Trail: For the way down, many hikers like to take the slightly longer John Muir Trail from the top of Nevada Fall. It has different views and is a slower, drier walk down that is easier on tired knees.
6. Camp Muir

What Makes It Look So Easy?
On a clear, sunny day in summer, the hike to Camp Muir on Mount Rainier is a wonderful idea. It starts from the colorful wildflower fields of Paradise at 5,400 feet. The route goes up to the stone buildings of Camp Muir at 10,188 feet.
From below, the top part of the route—the Muir Snowfield—looks like a huge, solid white field. It looks like a simple, though hard, “snow hike.” The sight of many other hikers doing the same trek makes it seem like a safe and popular path.
What’s the Real Danger?
The biggest trick of this hike is its name. The “Muir Snowfield” is not a snowfield; it is a moving glacier. Thinking of it as a “snow hike” is the cause of most problems on the route. It leads people to not prepare enough.
They leave behind the special gear and skills needed for glacier travel. While the main route is mostly free of cracks early in the season, hidden cracks can open up, especially later in the summer.
The biggest danger, though, is the mountain’s famously changing weather. A sudden, thick whiteout can cover the snowfield in minutes.
This can make you see almost nothing. On the plain white snow, with no trail to follow, you can get lost right away. Without the right navigation tools, hikers can easily walk off the safe path.
They can end up on the heavily cracked Nisqually Glacier or the Paradise Glacier. There, a wrong step can lead to a deadly fall into a deep, hidden crack.
A Story You Don’t Want to Be Yours
The rescue report for Aaron Demarre, a snowboarder, shows the confusing power of a whiteout. As bad weather came in, Demarre got lost on his way down. He lost his track and ended up on the Paradise and Williwakas glaciers.
He did not have any of the “ten essentials” or gear for staying overnight. He had to survive for 44 hours in a storm, digging snow caves with his snowboard. He was able to find his way back to Paradise when the weather cleared.
But his story shows the small difference between a scary survival story and another death on the mountain.
How to Hike to Camp Muir Safely
- Location: Mount Rainier National Park, Washington
- Elevation: 10,188 feet (3,105 m) at Camp Muir
- Elevation Gain: ~4,800 feet (1,463 m) from Paradise
- Key Dangers: Whiteouts, Getting Lost, Falls into Cracks, Hypothermia, Avalanches
- Important Fact: Over 90 hikers have died on the route to Camp Muir, making it one of America’s most dangerous day hikes. It is the most common place in the park for hikers to get lost.
Your Survival Guide
- Navigate Like an Expert: Do not try this hike without the right navigation tools and the knowledge to use them. This means a map, a compass, and an altimeter. A GPS or phone with the route downloaded is also a must. Get the compass directions for the route before you start.
- Traction is a Must: The snowfield can be hard, icy, or slushy. You need at least microspikes. In icier conditions, you may need full crampons. Trekking poles are also very important for balance.
- Prepare for a Blizzard: Like with Mount Washington, pack for the worst possible weather. This includes full waterproofs, warm layers, a warm hat, gloves, and special glasses for sun and wind.
- Respect the Weather: If you cannot see well, do not go. If a whiteout comes, the safest thing to do may be to stay put (if you have emergency gear) or carefully follow your steps back using GPS before you get lost.
7. Kalalau Trail
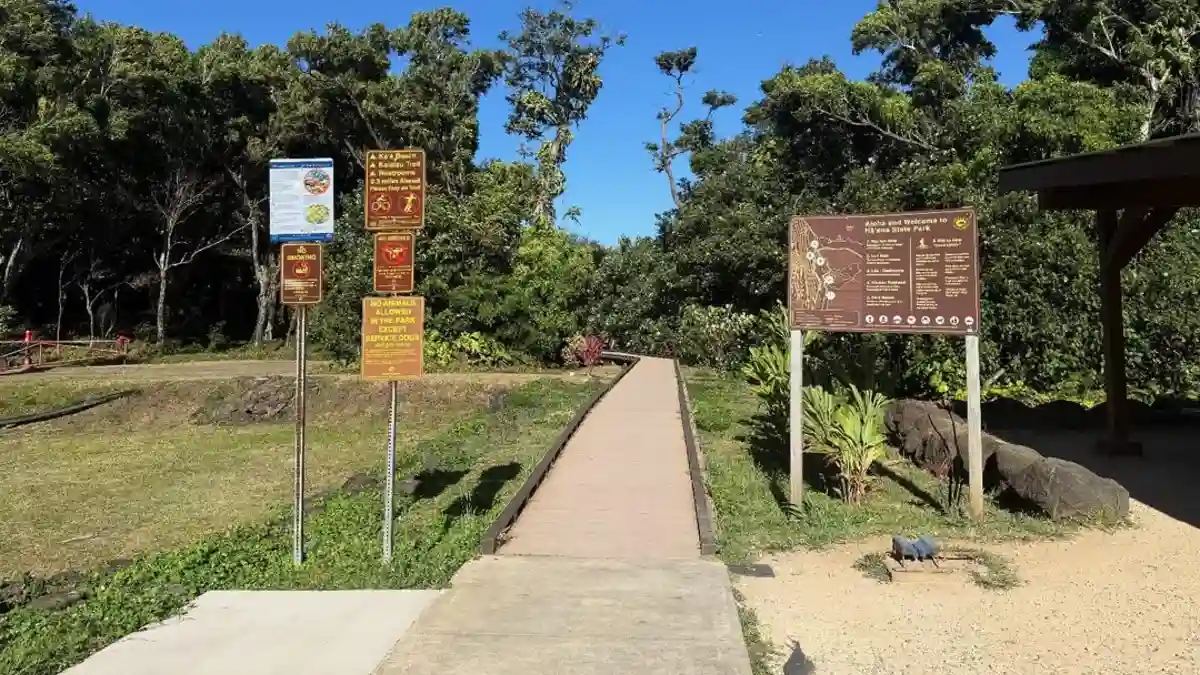
What Makes It Look So Easy?
The Kalalau Trail on Kauai’s Nā Pali Coast is a legend. It is seen as one of the most beautiful coastal hikes in the world.
The 11-mile hike goes through an amazingly beautiful landscape: green rainforests on dramatic cliffs that drop into a blue ocean.
The final stop, the hidden Kalalau Beach, is a picture of a perfect, untouched paradise. For many, the pictures and stories of this trail are the best of adventure travel, a top life experience worth any effort.
What’s the Real Danger?
The big trick of the Kalalau Trail is that the things that make it so beautiful are also its biggest dangers. The green plants are fed by heavy, sudden rain that can cause strong flash floods at the trail’s three big stream crossings.
These crossings, especially the one at Hanakāpīʻai Stream two miles in, can change from calm, knee-deep water to a raging, impossible river in minutes.
This can trap hikers or sweep them out to sea. Flash floods are the main cause of accidents and deaths on the trail.
The dramatic cliffs lead to the trail’s other famous feature: Crawler’s Ledge. Around mile 7, this part is a narrow, crumbling, and open path cut into the side of a sheer cliff, hundreds of feet above the ocean.
With loose ground and a huge drop, a fall here is deadly. These dangers are made worse by how far away the trail is. There is no cell phone service, and rescues are hard, depend on the weather, and are often late.
A Story You Don’t Want to Be Yours
The danger of the stream crossings was sadly shown in February 2013. During a heavy rain, a woman trying to cross the high Hanakāpīʻai Stream was swept away by a flash flood and drowned.
The same event left 54 other hikers stuck on the other side of the river overnight. They could not cross the dangerous water until it went down. This story clearly shows that the biggest and most overlooked danger on the trail is not the high cliffs, but the water.
How to Hike the Kalalau Trail Safely
- Location: Nā Pali Coast State Wilderness Park, Kauai, Hawaii
- Length: 11 miles (17.7 km) one-way
- Key Dangers: Flash Floods, Drowning, Exposed Cliff Ledges (Crawler’s Ledge), Falling Rocks, Slippery Mud
- Important Fact: In 2022 alone, the trail led to 46 rescue operations. More than 100 people have reportedly died from drowning in the strong ocean waves at the trail’s remote beaches.
Your Survival Guide
- You Must Have a Permit: A camping permit is needed to hike past Hanakāpīʻai Valley (the 2-mile mark). These are hard to get and must be booked up to 90 days before.
- Watch the Weather and the Water: Check weather reports every hour. The most important rule on this trail is: if a stream is rising and looks muddy and brown, do not cross. Wait for the water to go down. It could save your life.
- Pack for Surprises: The weather changes fast. Bring good rain gear and enough food and supplies for an extra day or two in case you get stuck by a flooded stream.
- Respect the Ocean: The beaches along the Nā Pali coast have strong currents and waves. There are no lifeguards. Swimming is very dangerous and has killed many people.
8. Precipice Trail
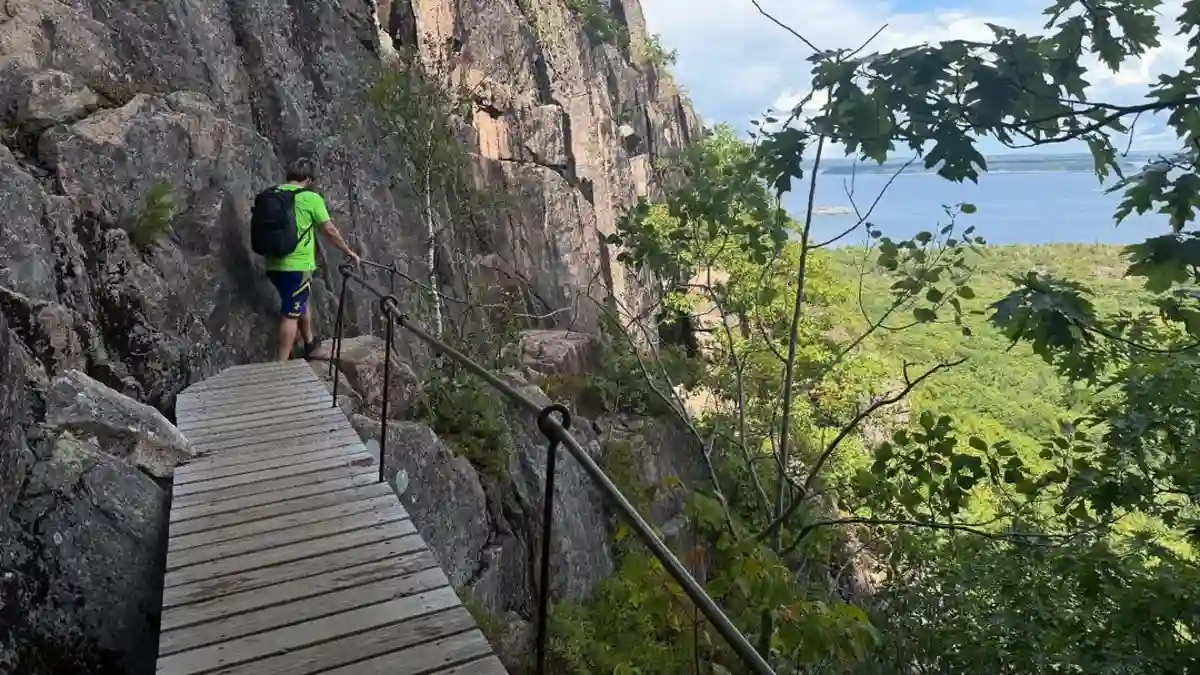
What Makes It Look So Easy?
The Precipice Trail offers a strong and attractive promise: the thrill of a big mountain climb in a short, easy-to-reach day hike.
The whole loop is just over two miles long and can be done in a few hours. This makes it a popular challenge for fit visitors to Acadia National Park.
It is often compared to the nearby and easier Beehive Trail. This can lead hikers to think it is just the next step up in difficulty. Its short length and the idea of it as a “hike” are its main tricks.
What’s the Real Danger?
The Precipice Trail is not a hike. It is a climb that follows a route with iron bars up a nearly straight-up granite cliff face.
You do this without the safety of a harness or ropes. Hikers must pull themselves up a series of iron rungs and ladders, often with hundreds of feet of open air right below them.
The danger here is not the slow tiredness that affects longer trails. It is sudden, quick, and unforgiving. A single slip, a missed handhold, or a moment of fear can lead to a deadly fall.
This changes the meaning of a “hard” trail. In most hiking, “hard” means a long distance and a big climb—a challenge for your heart and lungs.
The Precipice Trail is hard because of its open drops and the serious result of a mistake. A hiker who is fit enough to run a marathon may not be ready for the vertical climb and constant focus needed on the Precipice.
People hear “hard hike” and think “exercise,” but they should be thinking “climbing.” This confusion leads to a big problem in how people prepare.
A Story You Don’t Want to Be Yours
While deaths on the Precipice are not common, they do happen. A woman died from a fall in 2012. What might show the trail’s danger even more are the difficult and risky rescues needed for those who get hurt.
A 2018 rescue involved many workers carrying an injured hiker across a dangerous rock field for four hours.
These events show that even a fall that does not kill you has serious results, not just for the person but also for the rescue teams who have to work in the same risky place.
How to Hike the Precipice Trail Safely
- Location: Acadia National Park, Maine
- Length: 2.1-mile (3.4 km) loop
- Elevation Gain: 1,059 feet (323 m)
- Key Dangers: Huge Vertical Drops, Falls from Rungs and Ledges
- Important Fact: The trail is closed for a large part of the year (usually mid-March to mid-August) to protect nesting falcons, which can be aggressive.
Your Survival Guide
- Check Your Fear of Heights: This is the main thing to think about. If you have a big fear of heights, do not try this trail.
- Bad Weather is a No-Go: Never hike the Precipice Trail in the rain, snow, or ice. The rock and iron rungs get very slippery when wet.
- One-Way Only: For safety, the trail should only be climbed up. Going down the rungs is much more dangerous and causes risky traffic jams. Use other trails for the way down.
- Leave Kids and Dogs at Home: This trail is not for children or pets.
- Check for Closures: Always check the official park website for the current trail status, as it is often closed for falcon nesting.
9. Angels Landing
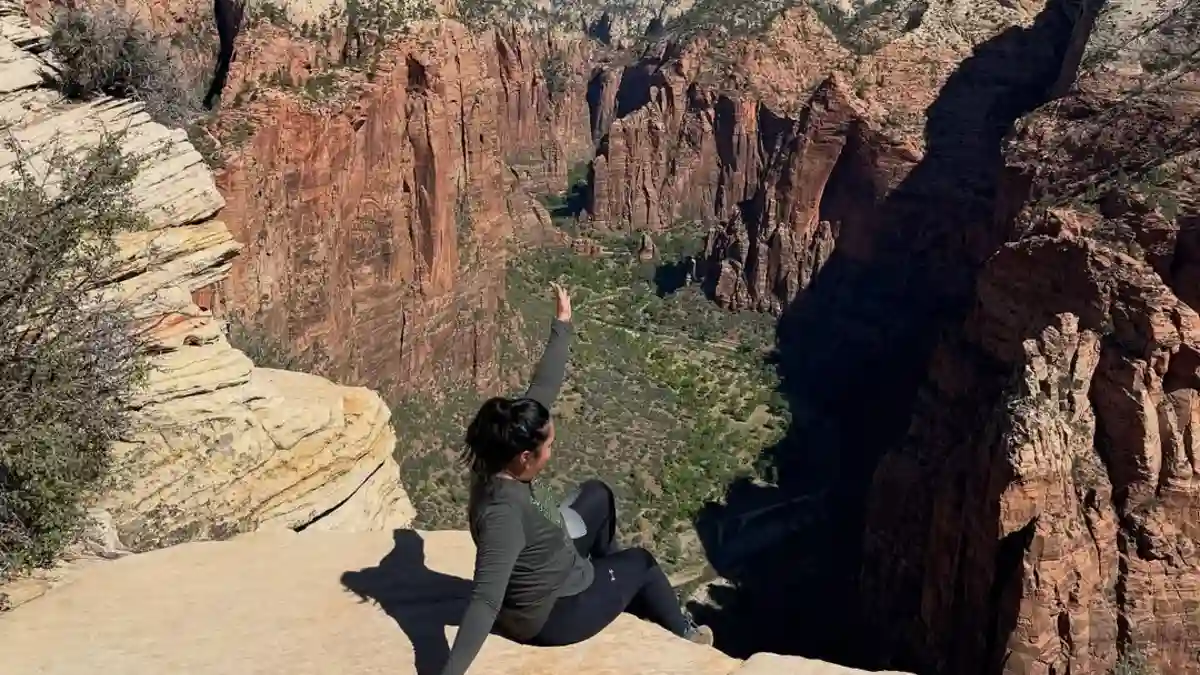
What Makes It Look So Easy?
Angels Landing is more than a hike; it is a huge trend. Driven by years of popular pictures on social media, it has become one of the most famous and wanted outdoor experiences in the world.
The trail’s appeal is helped by its setup. The first two miles are a hard but well-made hike up a series of switchbacks to a spot called Scout Lookout.
This first part, while tough, is a normal trail. It tricks hikers into thinking the main challenge is just physical fitness. The truly dangerous part is very short—a final half-mile to the top.
What’s the Real Danger?
The final half-mile of Angels Landing is a lesson in exposure. The route follows a narrow sandstone ridge, in some places only a few feet wide, with drops of over 1,000 feet on both sides.
Chains bolted into the rock give you something to hold on to, but the mental pressure is huge. In recent years, this natural danger has been made much worse by a new, man-made problem: too many people.
The trail’s social media fame has created a cycle: online popularity brings huge, often unprepared crowds to a dangerous place, which in turn makes the place more dangerous for everyone.
“Human traffic jams” happen at the most open parts. This forces tired hikers to pass each other on a knife’s edge, often letting go of the chain to do so.
This problem got so bad that the park service had to start a permit lottery system in 2022 to limit the number of hikers on the chains. This was a clear sign that popularity itself had become a major safety threat.
A Story You Don’t Want to Be Yours
With at least 18 known deaths, the list of sad stories on Angels Landing is long. The causes range from weather and simple slips to careless actions. In June 2007, a 53-year-old man fell several hundred feet.
A witness said he was “goofing off” near the edge and the ground broke under him. In June 2004, a 14-year-old boy fell while trying to scratch his name into the rock on a narrow ledge for a $5 bet.
These stories, plus the constant pressure of people going both ways on the narrow ridge, show how the mix of huge drops and human actions creates a very dangerous place.
How to Hike Angels Landing Safely
- Location: Zion National Park, Utah
- Length: 5.4 miles (8.7 km) roundtrip
- Elevation Gain: ~1,500 feet (457 m)
- Key Dangers: Huge Drops, Falls from Heights, Too Many People
- Important Fact: At least 18 people have died on the trail since 2000. A permit, which you get through a lottery, is now needed to hike the part with chains.
Your Survival Guide
- Get a Permit: You cannot hike the chained part without a permit from the lottery on Recreation.gov. Rangers check for permits at Scout Lookout.
- Use the Chains: Hold on to the chains. Keep three points of contact when you can. Wear gloves with a good grip to protect your hands and improve your hold.
- Be Polite on the Trail: Be patient. Hikers going up usually have the right of way, but use common sense. Talk to others and do not rush people who are slow or nervous.
- Go Early: Even with the permit system, starting your hike on the first bus of the day will give you the best chance for cooler weather and fewer people on the ridge.
- Know Your Limits: The hike to Scout Lookout is a great and hard hike on its own, with amazing views. It is okay to stop there if you are not comfortable with the drops on the final part.